https://www.cnblogs.com/guarderming/p/10984175.html
Office Online Server部署安装
部署环境
一台windows server2012 (搭建域环境)/多次遇坑之后,强烈建议域环境为server2012
一台windows server2016(部署office lnline server)
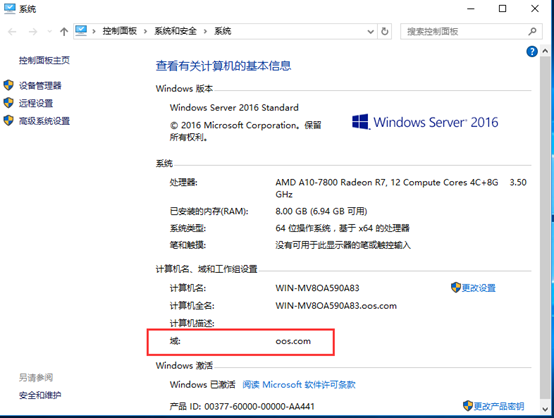
Ip地址:
域服务器:192.168.1.173
Office online server:192.168.1.196
部署AD域服务器
(192.168.1.173)
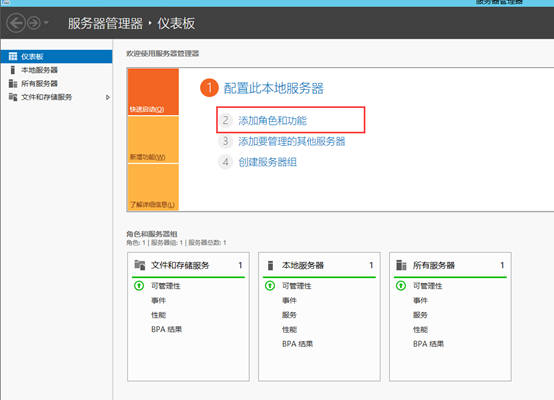
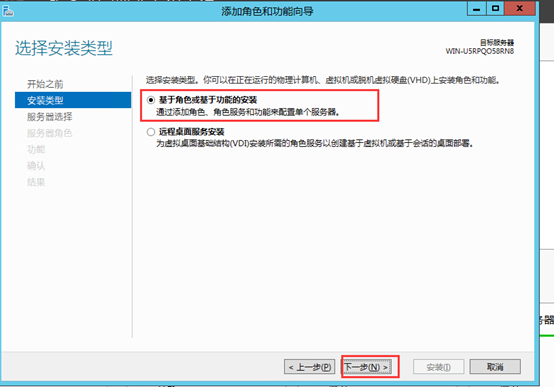
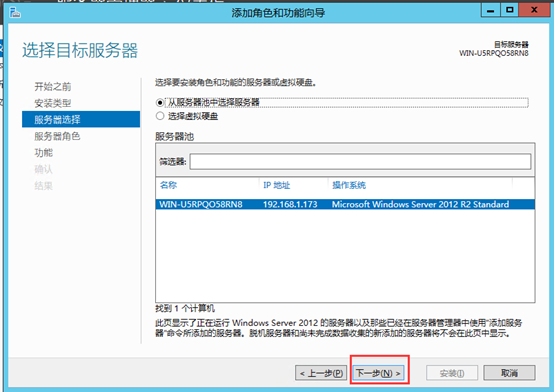
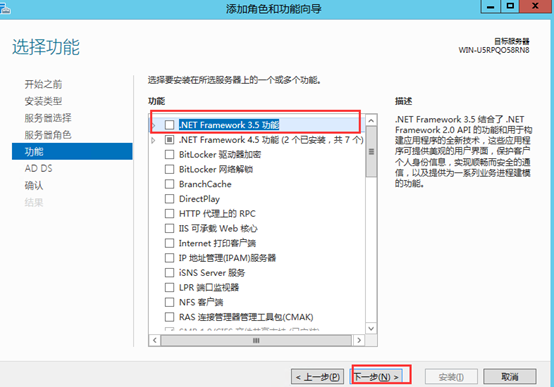
添加脚色和功能
默认下一步

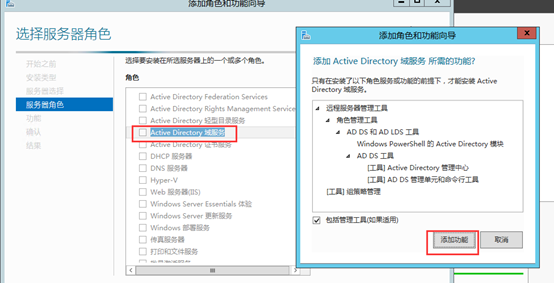
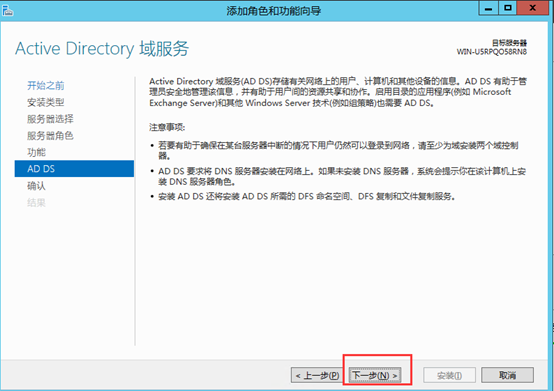
添加AD域服务器
安装.net3.5
默认下一步
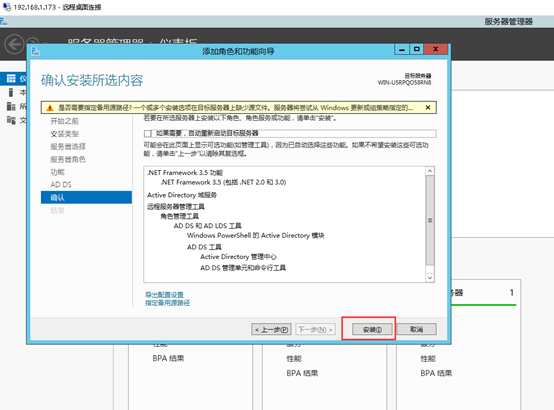
点击安装,安装功能。
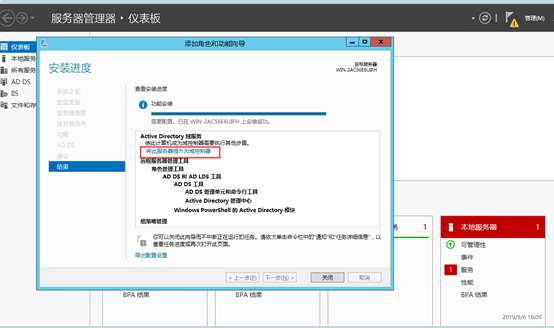
安装完成后,点击“升级为域控制器” ;
进入AD域(oos.com)服务器配置向导,选择添加新林,并输入根域名,下一步;
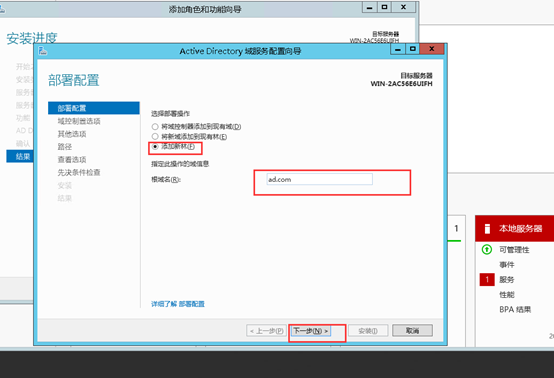
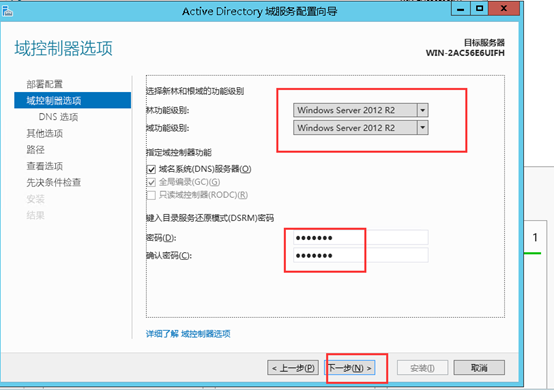
填写密码,下一步 ;密码:hq.123 密码按要求就行,我的是hq.123
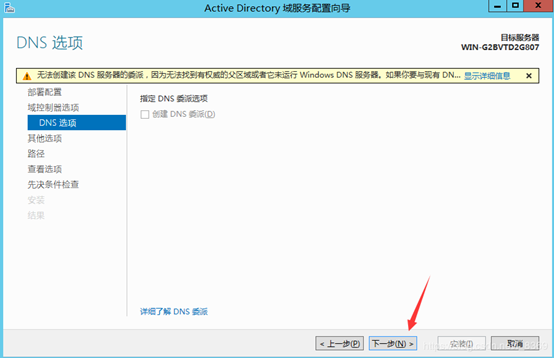
提示DNS无法创建,不用管,继续下一步;
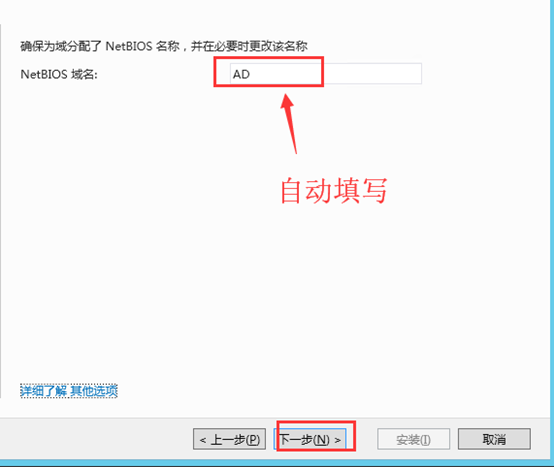
自动填写(oos),下一步;
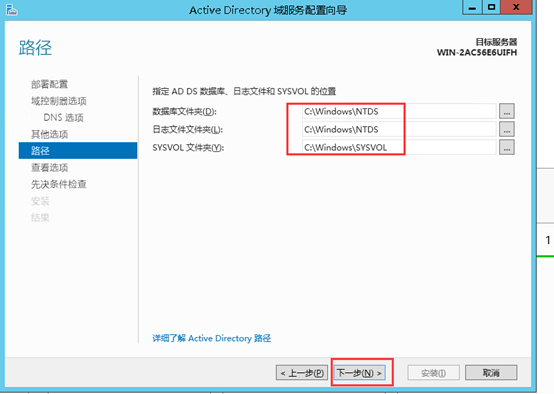
安装路径,默认,下一步;
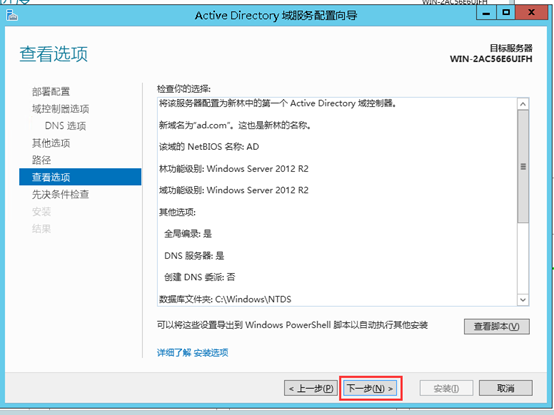
查看选项,默认,下一步;
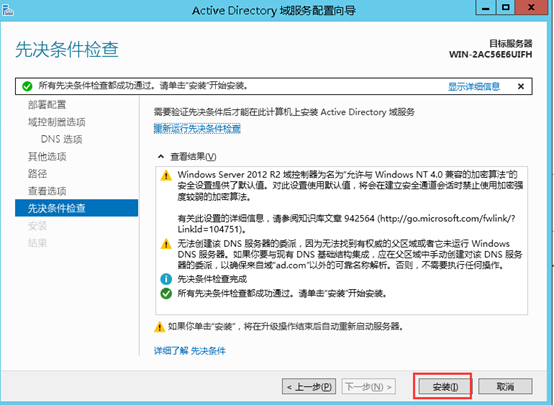
点击安装,安装完成后重启系统即可
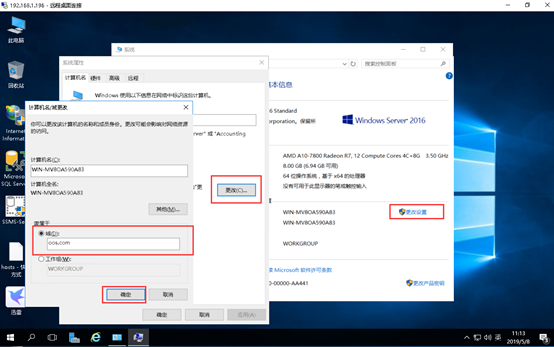
三、服务器加入到域
192.168.1.196上操作
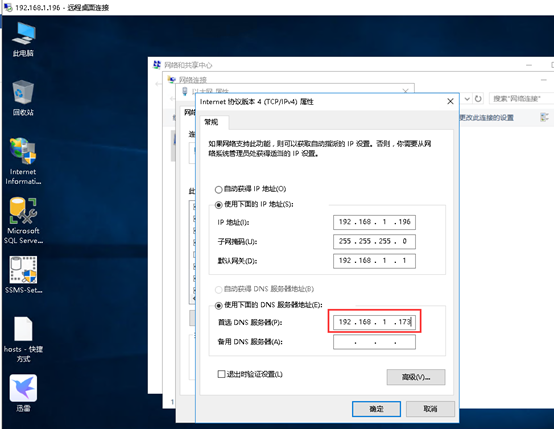
更改dns地址
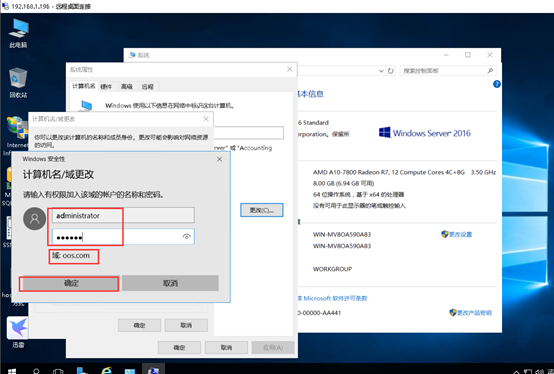
更改计算机名称加入域
输入域服务器管理员账号密码
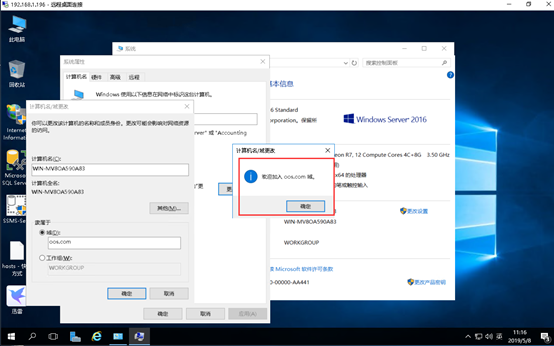
出现欢迎界面表示加入域成功
之后重启系统进入到域环境
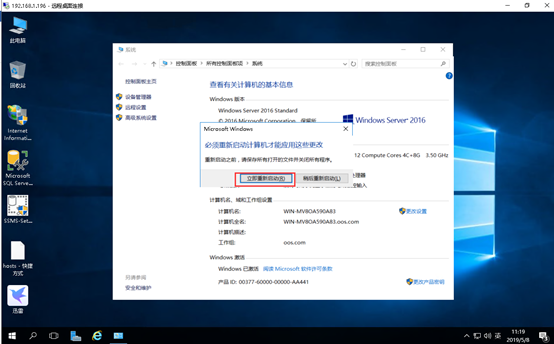
重启之后发现已经进入到了域环境
192.168.1.196:
1.配置组策略设置:
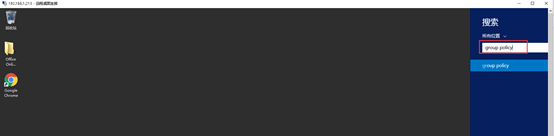
打开组策略编辑器:
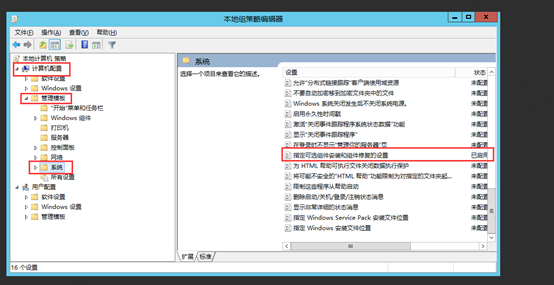
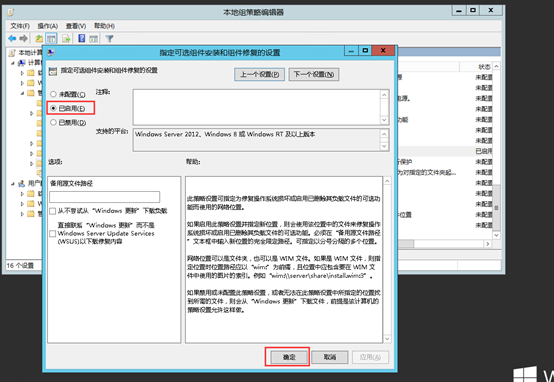
将组件修复功能启用:
shell:(刷新组策略)
gpupdate / force
2.安装角色和服务
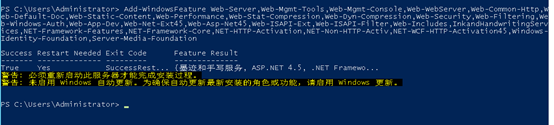
Shell:以管理员身份运行
Add-WindowsFeature Web-Server,Web-Mgmt-Tools,Web-Mgmt-Console,Web-WebServer,Web-Common-Http,Web-Default-Doc,Web-Static-Content,Web-Performance,Web-Stat-Compression,Web-Dyn-Compression,Web-Security,Web-Filtering,Web-Windows-Auth,Web-App-Dev,Web-Net-Ext45,Web-Asp-Net45,Web-ISAPI-Ext,Web-ISAPI-Filter,Web-Includes,NET-Framework-Features,NET-Framework-45-Features,NET-Framework-Core,NET-Framework-45-Core,NET-HTTP-Activation,NET-Non-HTTP-Activ,NET-WCF-HTTP-Activation45,Windows-Identity-Foundation,Server-Media-Foundation
报错找不到源文件按如下操作:
然后用powershell安装就成功了。
PS C:UsersAdministrator> Install-WindowsFeature NET-Framework-Core –Source ‘d:Sourcessxs’
2.1按回车如下图

2.3安装完成如下图
三、完成后,下载安装以下软件
NET Framework 4.5.2
—- http://www.microsoft.com/zh-cn/download/details.aspx?id=42643
Visual C++ Redistributable Packages for Visual Studio 2013
—- https://www.microsoft.com/en-us/download/details.aspx?id=40784
Visual C++ Redistributable for Visual Studio 2015
—- http://www.microsoft.com/en-us/download/details.aspx?id=48145
Microsoft.IdentityModel.Extention.dll
—- https://go.microsoft.com/fwlink/p/?LinkId=620072
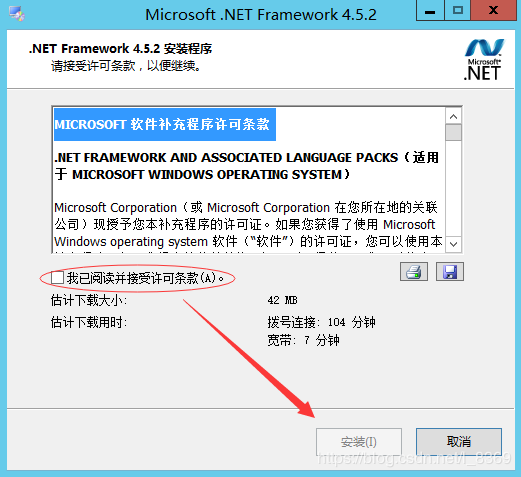
1、Microsoft .NET Framework4.5.2
运行Microsoft .NET Framework4.5.2安装包,勾选“我已阅读并接受许可条款”点击“安装”。
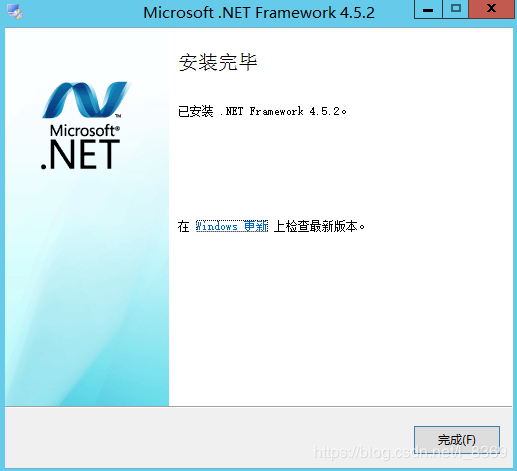
点击“完成”,完成Microsoft.NET Framework 4.5.2的安装。
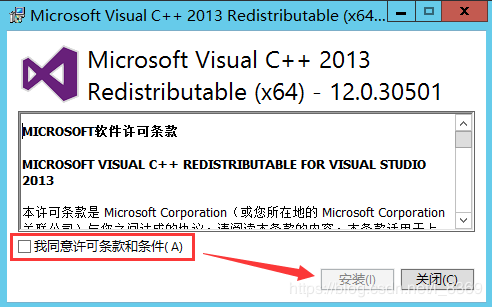
2、Visual C++ Redistributable Packages for Visual Studio 2013
运行Visual C++ Redistributable Packages for Visual Studio 2013安装包,勾选“我已阅读并接受许可条款”点击“安装”。
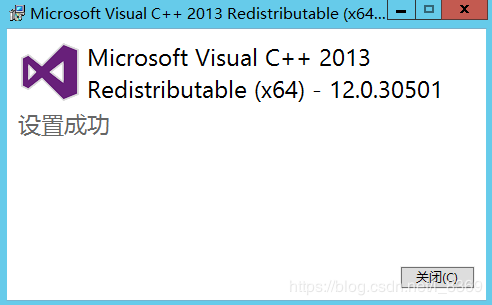
点击“关闭”,完成Visual C++ Redistributable Packages for Visual Studio 2013的安装。
3、Visual C++ Redistributable for Visual Studio 2015
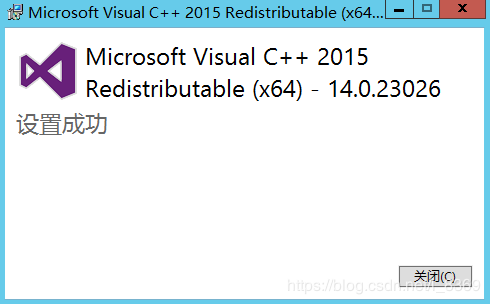
运行Visual C++ Redistributable for Visual Studio 2015安装包,勾选“我已阅读并接受许可条款”点击“安装”。

点击“关闭”,完成Visual C++ Redistributable Packages for Visual Studio 2013的安装。
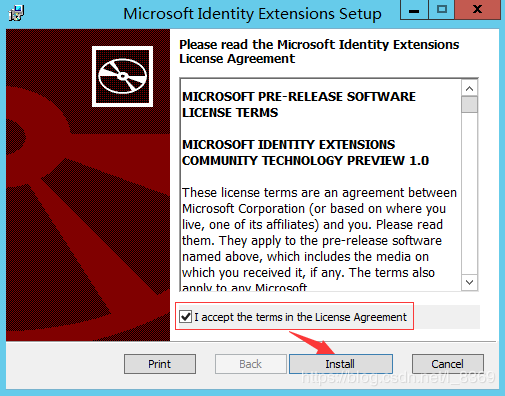
4 Microsoft.IdentityModel.Extention.dll
运行Microsoft.IdentityModel.Extention.dll 安装包,勾选“I accept the terms in the License Agreement”点击“install”。
点击“关闭”,完成Visual C++ Redistributable Packages for Visual Studio 2013的安装。

四、安装office online
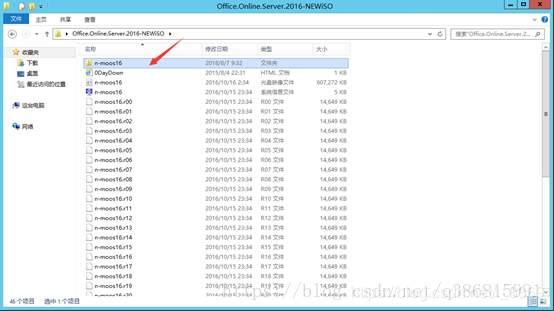
1、将下载好的office online server 2016的安装包解压好,并点击图中标注文件夹
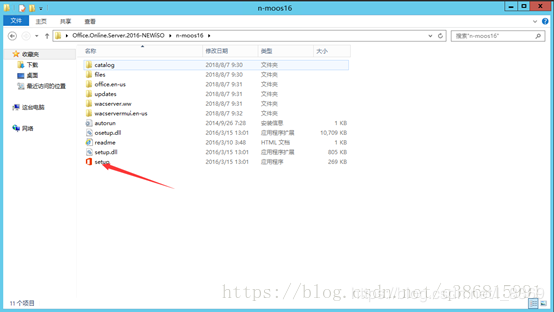
2、点击setup.exe
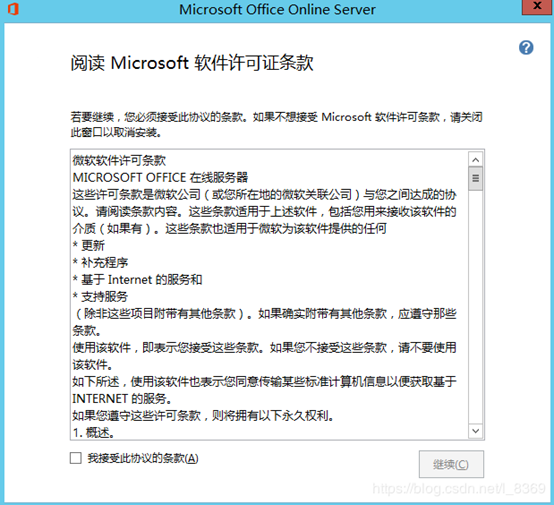
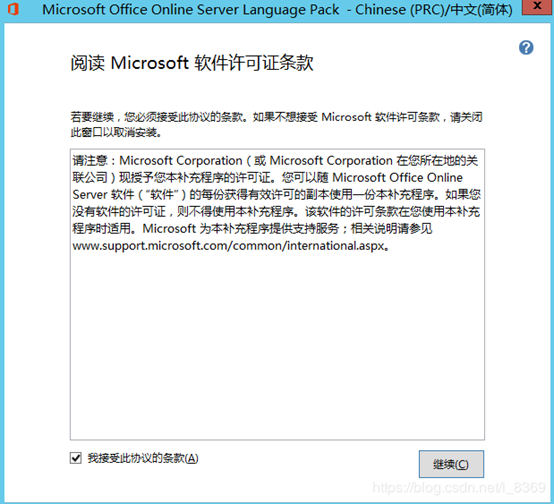
3、勾选“我接受此协议的条款”点击“继续”。
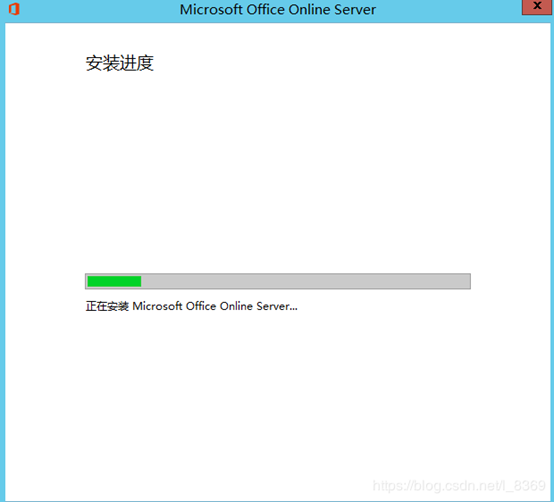
4、默认安装路径,点击“立即安装”

5、 安装进行中,待进度完成;安装完成,关闭。
6、安装中文语言包
7、安装完成,关闭

五、相关配置
1、office online server 配置
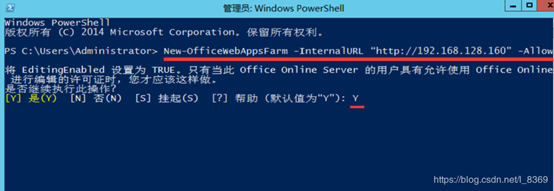
1.1、安装完成后,打开PowerShell,开始配置office online server
输入:
New-OfficeWebAppsFarm -InternalURL “http://192.168.128.160”-AllowHttp –EditingEnabled
注:若http:// 192.168.128.160/hosting/discovery 能登录,http://192.168.128.160/op/generate.aspx显示“服务器错误”,控制台输入:Set-OfficeWebAppsFarm -OpenFromUrlEnabled:$true即可访问成功
注:192.168.128.160为当前服务器的ID
1.2、
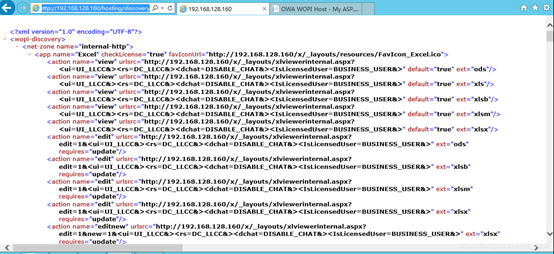
打开http://192.168.128.160/hosting/discovery链接,如下图则表示office online server安装部署成功
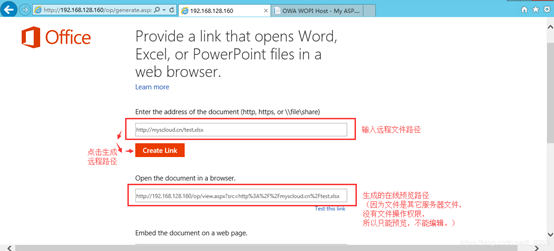
打开http://192.168.128.160/op/generate.aspx 链接,如下图则表示office online server安装部署成功
2、部署网站
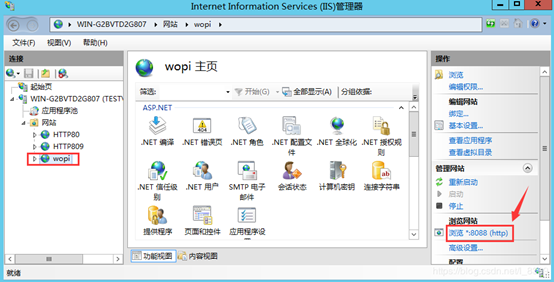
2.1 打开IIS,右键点击网站–>添加网站
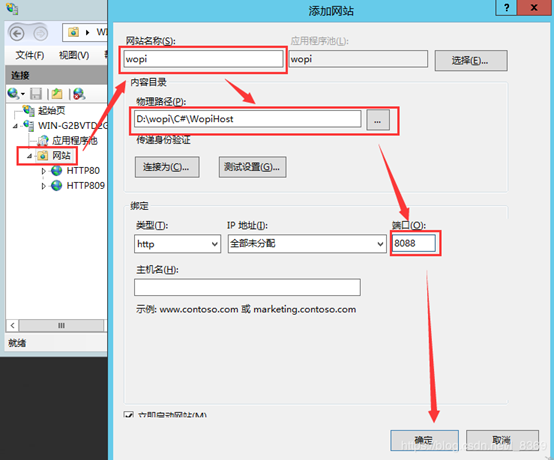
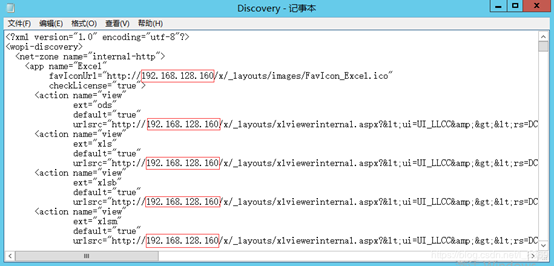
修改的地方1:App_Data/Discovery.xml
修改网站名(标记)
修改地方2:Web.config
修改标记的地方(仅修改网站名及端口)

2.2、预览网站
2.3、网站首页
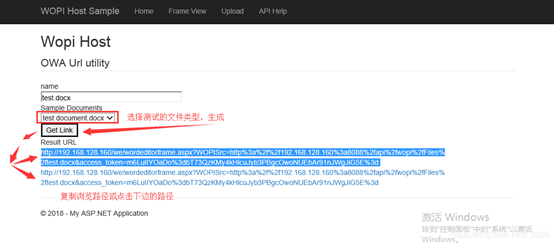
2.4、预览页面